How to Develop a Family DIY Safety Routine that will Last Longer than the Handbook
Although it might look good to introduce kids to some basic safety measures before a DIY activity starts, in fact, the best thing you could do would be to show what being safe means every single time.
Kids understand a lot from what they observe around. They notice when their parents wear protective glasses before drilling. They see if a person uses tools properly, cleans up the area before cutting or decides to stop because it is not safe anymore.
The thing is that the best family DIY safety routine is not something you can describe in your handbook but rather something that becomes a vital part of every project.
Examples Are What Children Learn From
It may be easy for parents to tell their kids to be careful when working with tools. However, to make them heed their warnings may be harder when the grown-ups themselves are not always paying attention to the safety measures.
When a child sees how parents operate a drill for the first time, he or she will not comprehend all the risks related to this particular kind of work. Still, the kid will see how the drill can be used safely – only on a stable surface with no loose clothing around, and when the grown-up puts on safety goggles prior to working with the tool.
In other words, this example demonstrates to the child that there is nothing frightening in working with the tools safely. This is just what needs to be done to get things done in a proper way.
This example is especially valuable for kids who are only learning how to engage in the projects. They can help by holding materials, taking measurements of pieces of wood, sanding surfaces or painting planters.
Make safety routine a part of the fun.
Following safety instructions can be seen as a kind of hindrance to children who are eager to start working. The best way to solve this issue is to make those rules fit into a project rather than to become a boring preamble before it.
Before starting to work on the project, spend some time preparing the workspace together with your children. Clear up everything that may become an obstacle, stabilize the working surface and gather all the tools you need for the project. In this way, you will give your children an opportunity to take part in some preparatory activities.
Moreover, you can develop a small safety routine that becomes automatic in time. For example, it may include checking three things before using any tool: where it will be used, where the hands of people should stay and what protective equipment will be necessary. It may be very simple, but the purpose is to make some stop to think before starting to work.
Such a routine will help your children understand that safe projects are always prepared in advance. In addition, it will allow adults to avoid the temptation to start working quickly and solve problems as they arise.
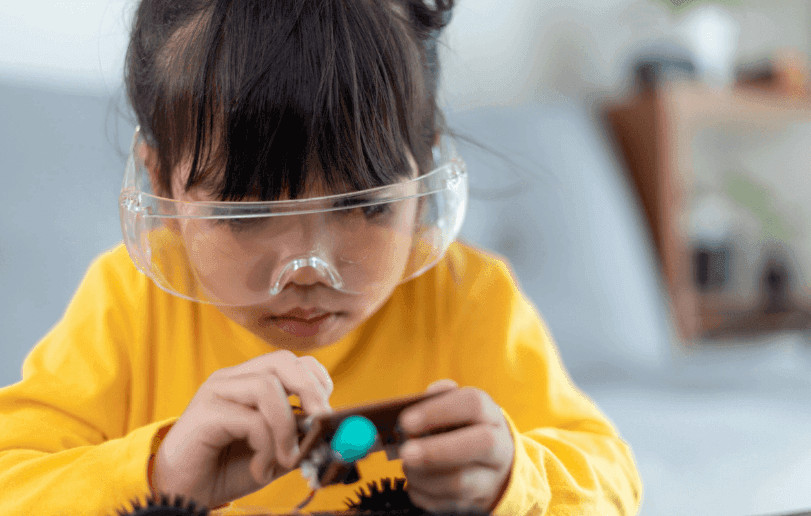
Wearing eye protection should be considered a usual thing.
Most family DIY projects pose potential eye hazards to the participants. Sanding causes fine dust to spread in the air; drilling may cause flying fragments of the material; cutting wood, trimming garden materials or using a rotary tool creates debris that flies faster than one might expect.
It does not mean, however, that all household projects are dangerous or that children should be afraid of the tools used in them. It just means that eye protection should be regarded as one more piece of equipment that should be worn in addition to a tape measure, a pencil or gloves.
If your children see you putting on safety goggles before starting some activity, they will associate protective equipment with expertise and skillfulness. The message becomes clear: “This is how we do things properly” rather than “There must be something scary since we need special equipment.”
Adults with glasses should not face the problem of choosing between being able to see and protecting their eyes. Properly fitted prescription safety glasses will make it easier to work comfortably during higher-risk household projects such as drilling, sanding, cutting or working with garden tools.
It is crucial that protective eyewear should be comfortable. Those which slip down, fog up or pinch behind ears are much more likely to be removed during the activity. In order for a safety habit to stick, the equipment should be practical enough so that people wanted to wear it.
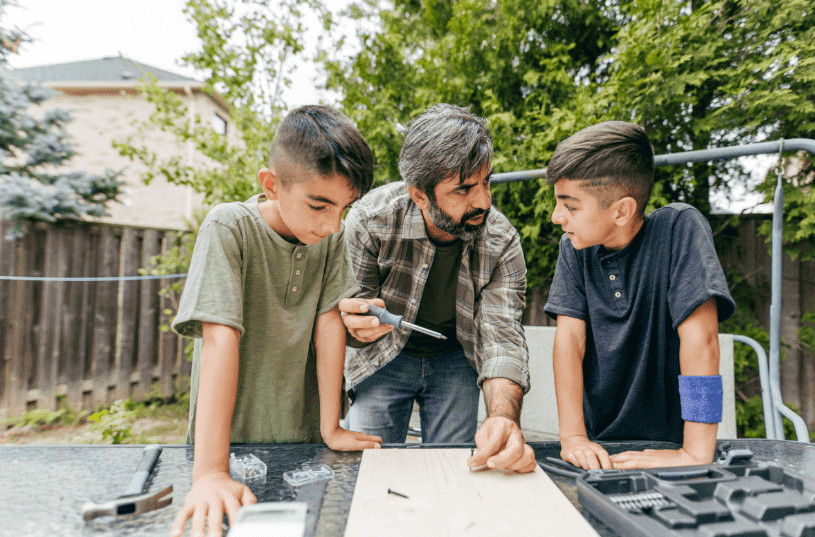
Keep children involved, but assign appropriate jobs.
One of the best ways to boost confidence is to involve children in the project and give them some responsibilities. However, you do not have to hand them every tool immediately. You have to find some tasks that will suit their age and level of skills.
Younger children can assist in sorting screws, holding a tape measure, marking lines, applying paint or selecting materials. Older ones may be ready to sand wood, use hand tools under close supervision or learn how to clamp some material so that an adult could cut it.
Higher-risk aspects of a project should still be performed by an adult. Handling power tools, sharp blades, hazardous chemicals or heavy materials requires more control, even when children are eager to participate actively. Such an explanation will not make them feel left out. On the contrary, they will learn that skills come gradually.
Moreover, it will allow you to explain why some tasks require more experience. A child is much more likely to accept the boundary when he or she understands that there is some reason for this decision other than simply saying “No”.
Provide workspace that promotes good habits.
An untidy workplace increases the likelihood of accidents. Tools get lost, extension cords become tripping hazards and loose materials may complicate moving around the area.
Before starting a new project, make sure there is enough space to work. Make the main workplace well-lit, store tools in their usual place and avoid placing anything sharp or heavy near the edge of a table. If you work outdoors, pay attention to the terrain, the weather and the movement of children and animals.
The same concerns protective equipment. It should be accessible when it is necessary. If it is stored in a box in the corner of the garage, there is a high chance that someone will find it not worth wearing.
This practical approach will remove potential excuses in advance.
Give every project a start and finish.
Children usually learn new routines easier when there is some structure. Therefore, each family DIY project should begin and end with some preparations.
Start with looking through the materials you are going to use together. Ask some simple questions, such as “What are we going to make?” or “Which tools will be used by adults?”. Also, try to figure out where each person will stand while cutting or drilling or which materials should be removed from the work surface.
This approach will allow you to involve children in the process and to teach them that every project is not merely about completing it as fast as possible.
This principle should be applied when the work is finished. Before admiring your creation, do not forget to clean up the workspace. Put away all the tools, collect all the screws and other materials scattered on the floor, dispose of the debris and wipe everything where it is needed. Children can help to perform all these tasks provided they are suitable for their age.
In this way, children will learn another important thing: safe DIY work does not end when the last piece is assembled or painted. Clean and organized workspace protects everyone who uses it later, including younger children, pets and adults who come back to the area later.
In time, such small routines become habitual. Children learn that preparation, protective equipment and cleaning up belong to the same process of creativity.
Discuss mistakes without scaring children.
Every experienced DIYer knows that a project sometimes does not go exactly according to the plan. The piece of wood can slip, it can be hard to see through the dust cloud or some tool can be used in a wrong position.
These situations can be good opportunities for discussion. Do not try to hide the fact that the mistake was made. Just try to figure out what could have been done differently. Maybe, the material had to be clamped first. Maybe, there was a lack of light. Maybe, the eye protection had to be worn before sanding instead of in the middle of the work.
This approach will teach your children that safety is not about perfection. It is about understanding when some changes are necessary and making better decisions next time.
It is much more useful than a simple instruction “to be careful”.
The Habits That Children Will Sdopt When They Grow Up Start At Home
The long-term benefit of family DIY is not only a shelf, planter, bird feeder or a garden project. It is confidence that children gain knowing that DIY can be creative and safe.
When children watch how adults are handling tools responsibly and wearing the proper equipment, they learn how it looks like. They understand that safety is not something that someone imposes on them. It is simply about respecting tools, the project and other people.
This lesson will remain with children long after the paint dries and the last screw gets tightened.
The best family DIY safety habits do not originate from a handbook. They start with demonstrating how a good builder behaves.