
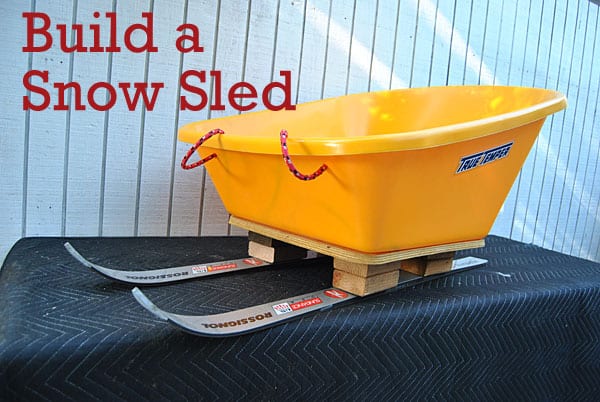
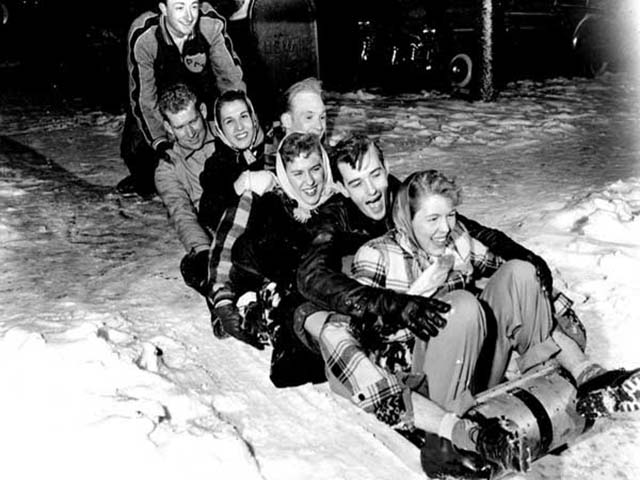
If there is one snow sport that everyone can enjoy it’s snow sledding. Age, experience and skill level are never questioned and the only requirement is that you have a good time.
Sledding technology has evolved from the iconic wood and steel runners to today’s slick plastic discs. Just because there haven’t been that many innovations doesn’t mean you can’t get creative with building your own sled. If you’ve got a pair of old skis that are just collecting dust in your closet, you’ve got the makings of a DIY snow sled.
This project is highly customizable and we encourage you to use the materials you have on hand to build this sled. There is nothing more fun than to design and build your sled then take a drive to the mountains to test it out. The thrill of that first ride is unforgettable!
Build and use this snow sled at your own risk. Sledding can be dangerous and this step-by-step should serve simply as a guide to building a sled that worked for us but we encourage you to make all necessary modifications to keep it safe and fun.
Gathering your materials for this project can be just as fun as the ride. We knew we wanted to use kid-sized skis as they seemed the perfect length. You can cut your long skis down to fit but we opted for a pair of kid length skis.
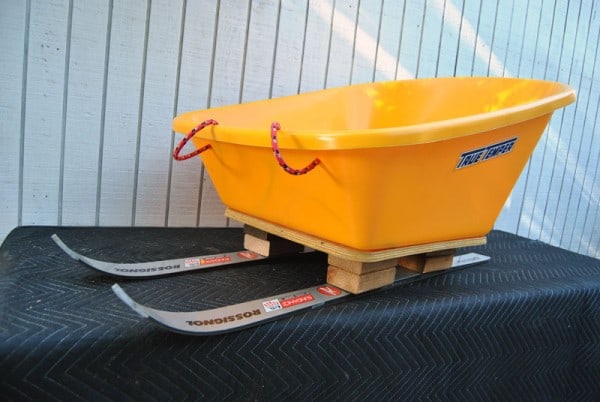
We wanted to sled in comfort and this 6 cu ft wheelbarrow bucket provides room for two (adult and child) and is made of sturdy plastic with no sharp edges.
The key to building this sled was creating the interface between the bucket where riders sit and the skis. The bucket needed to be raised off the snow to minimize drag and it had to have a solid foundation to attach the skis.
Shopping List:
Wheelbarrow bucket – Use your own or you can find one at your local home center or a used one in the classifieds.
Skis – We used kid length skis (147cm or 5 ft) but you can cut down any pair of adult skis to desired length.
Braided Poly Rope
2×4 at least 4’ in length
¾” Plywood (only need a 24”x24” piece)
3 ½” Corrosion resistant deck screws
5/16 Bolts, locking washers and nuts (if wheelbarrow hardware not available)
Tools:
Measuring Tape
Pencil
Jigsaw
Cordless Drill/Driver
Oscillating tool with metal blade or hand saw with metal blade
Sandpaper
Safety glasses
Cut List:
8 – 2×4 @ 5″ long (Risers)
1 – ¾” plywood cut at 24”x24” for base of wheelbarrow bucket
Step by Step
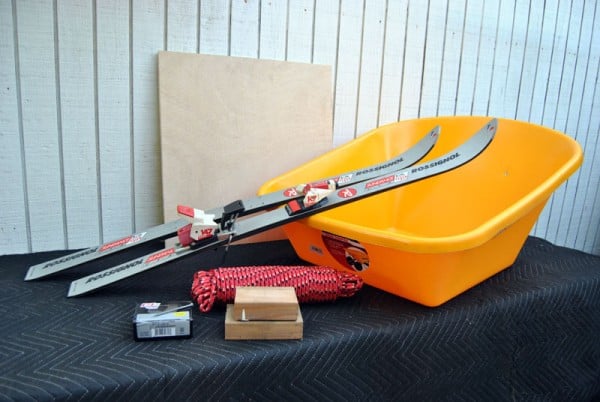
1. Gather Parts and Materials
Part of the joy of building this ski sled is that you’ll be upcycling used skis and possibly a worn out wheelbarrow. You can find used skis at most thrift stores as well as on Craigslist. We decided to use kid-sized skis as they were the perfect length for this project (5 ft).
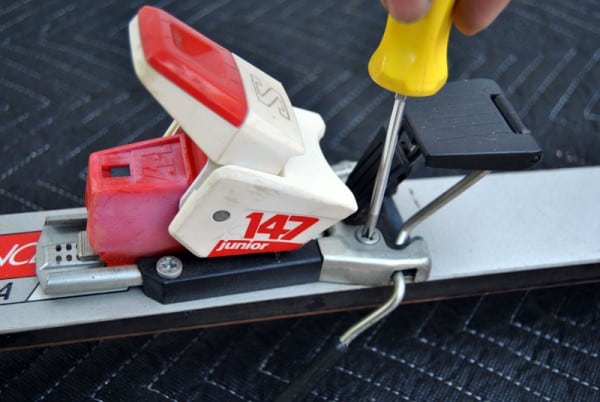
2. Remove Bindings from Skis
If your skis still have the bindings attached you’ll need to remove them using a screwdriver or cordless driver. There are typically four screws holding each binding in.
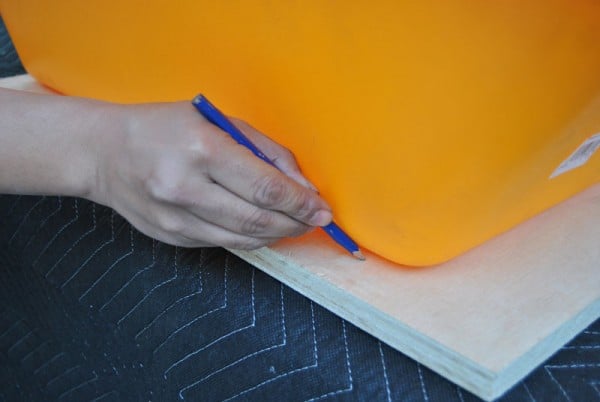
3. Outline Base
Place the wheelbarrow bucket onto the plywood and trace around the edge of the bottom of the wheelbarrow

4. Cut Base and Risers
Using a jigsaw follow the tracing of the base of the wheelbarrow and cut out your plywood piece. Measure 8 5” pieces of your 2×4 and using your jigsaw again cut your 2×4 to create the risers.
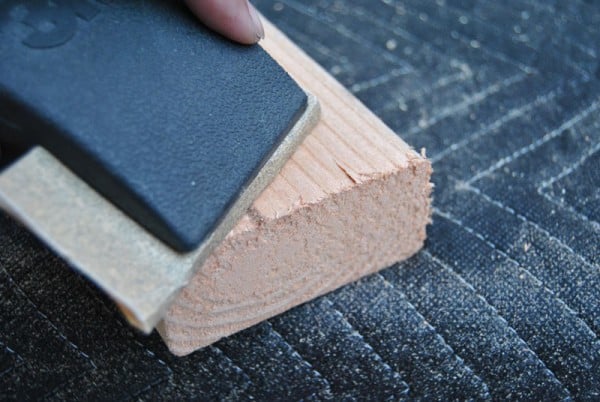
5. Sand Base and Risers
Using sandpaper and sanding block, smooth the edges around your base and risers
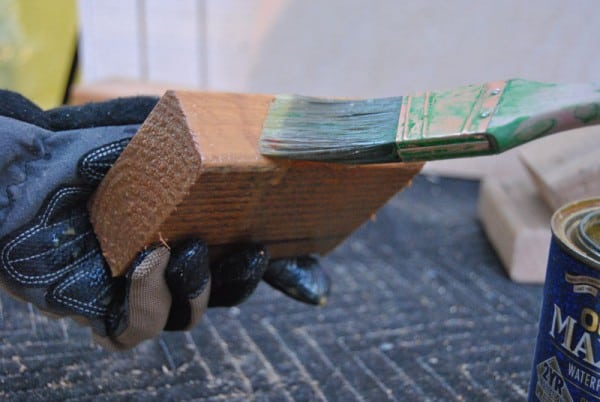
6. Seal Base and Risers
Use a water sealant to treat the wood risers and base. This will delay the wood from rotting and keep it water tight. Let it dry overnight.
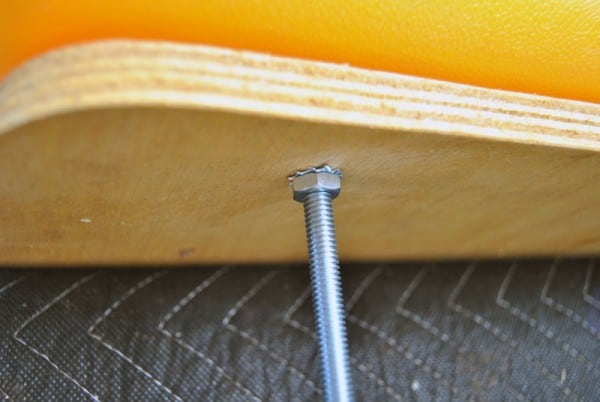
7. Attach Base to Wheelbarrow
The plywood base serves as a solid foundation to the ski sled and using the pre-cut holes in your wheelbarrow bucket mark the plywood below and drill holes then attach it to the plywood base using your existing wheelbarrow hardware or the correct sized bolts. Ours were 5/16”.
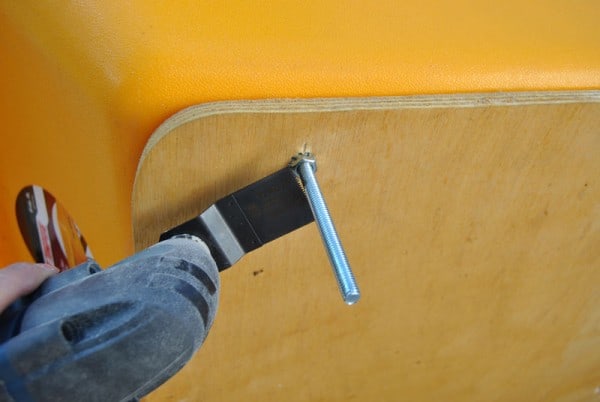
8. Remove Excess Bolt Length
Using a saw with a metal blade or an oscillating tool, cut down the bolts leaving about a ½ “.
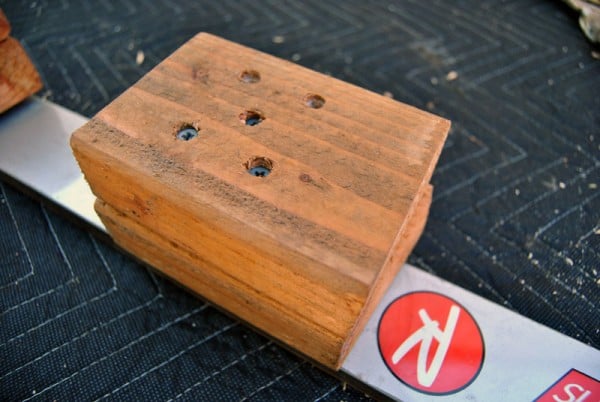
9. Attach Risers
Stack two risers over the holes where the bindings on the skis were attached and using your deck screws you can try to tap into the pre-existing holes but we ended up tapping new holes into the skis which is probably a stronger bond. Use used 5 screws to attach each set of risers.
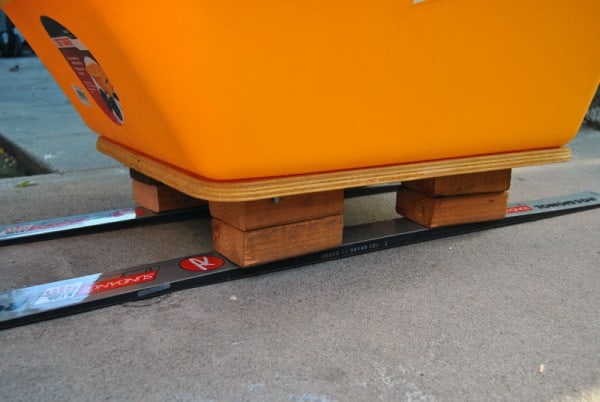
10. Place Bucket onto Skis
Now its finally coming together. Place your bucket (seat) onto the skis (runners) and check the alignment of the back of the skis and front of the skis to make sure they are even and straight. If you’d like to control the speed a bit you can angle the skis to tow-in slightly.
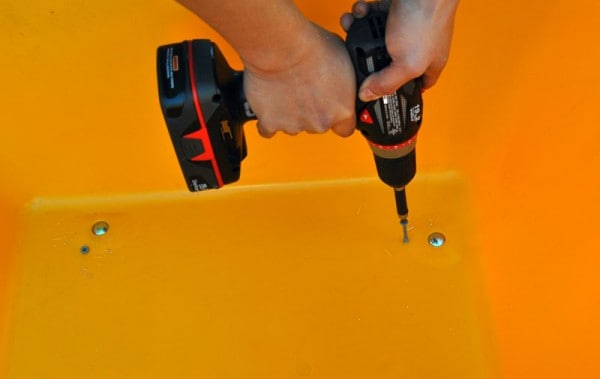
11. Screw Down Bucket
Using your deck screws attach the bucket to the risers.
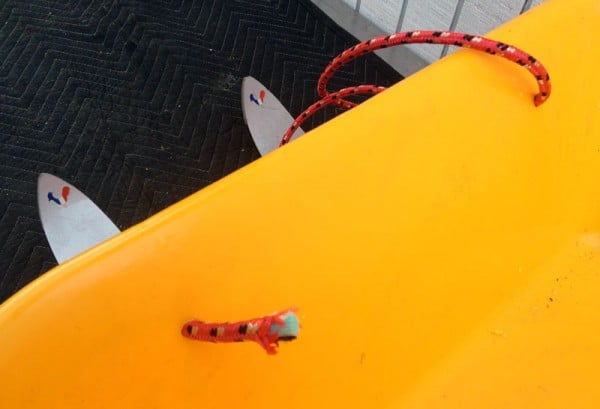
12. Add the Handle
Drill two holes in the front of the bucket and thread your poly rope through them. This will serve as both a handle to hold while riding as well as a way to pull the sled when you are climbing back up the hill.
13. Hit the Slopes
Sledding is fun but it can also be a dangerous activity. We recommend wearing a helmet and use this sled at your own risk. Each time you have finished sledding check the sled for worn out parts or cracks in the wood or skis and make the necessary repairs before using it again. Have Fun!!!
We originally built this project for the DIY Network. Do you like it?


Mercedes
18 Jan ’12 at 10:07 amI love the fact that the bucket is from a wheelbarrow! I can’t say that I would have ever thought to use it in that way.
Have you had an opportunity to try it out? looks like a lot of fun could be had with this guy!