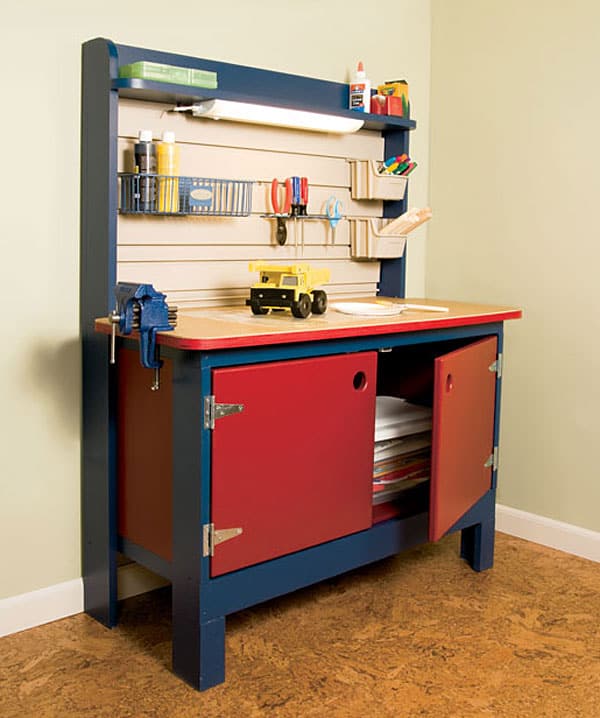
If you know a child who’s bursting with inventive ideas, this kid’s workbench is the perfect gift. Unlike most child-size benches, it’s not a toy. This is a real workbench, designed to withstand all of the challenges that a kid can pose.
Its large work surface, generous storage space, and built-in light make it perfect for a range of projects, from building birdhouses to creating scrapbooks.
Even a beginning woodworker can tackle this project. You can find all of the materials at a home center, and you can easily modify the dimensions to create a bench that’s the right height.
I painted this bench, but you could also leave it unpainted and let it wear naturally. After all, the best sign of good workbench is the well-worn patina that develops over years of use.
This project was designed by our good friend Dan Cary, who is an accomplished woodworker and former editor at Handy magazine.
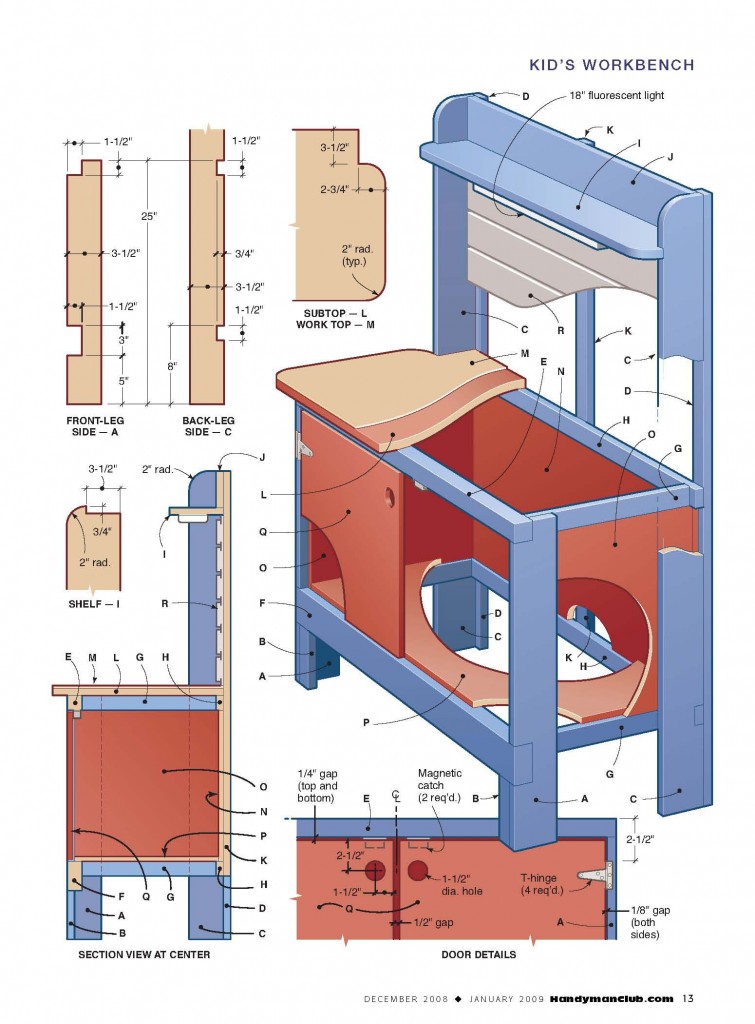
Kid’s Workbench Plan
Here’s the plan you should refer to throughout this project. Click image to enlarge and print.
KEY QTY. DESCRIPTION SIZE
A 2 Front-leg sides 3/4 x 3-1/2 x 25 in. *
B 2 Front-leg fronts 3/4 x 1-1/2 x 5 in. *
C 2 Back-leg sides 3/4 x 3-1/2 x 48 in. *
D 2 Back-leg backs 3/4 x 1-1/2 x 48 in. *
E 1 Front top rail 1-1/2 x 1-1/2 x 36 in.
F 1 Front bottom rail 1-1/2 x 3 x 36 in.
G 4 Side rails 3/4 x 1-1/2 x 13-3/4 in.
H 2 Back rails 3/4 x 1-1/2 x 36 in.
I 1 Top shelf 3/4 x 5-1/2 x 36 in.
J 1 Top shelf back 3/4 x 3-1/2 x 34-1/2 in.
K 1 Middle back post 3/4 x 1-1/2 x 41-1/2 in.
L 1 Subtop, plywood 3/4 x 17-1/2 x 40 in.
M 1 Work top, hardboard 1/8 x 17-1/2 x 40 in.
N 1 Back, MDF or plywood 1/2 x 15-1/2 x 34-1/2 in.
O 2 Sides, MDF or plywood 1/2 x 14-3/4 x 15-1/2 in.
P 1 Bottom, MDF or plywood 1/2 x 14-3/4 x 33-1/2 in.
Q 2 Doors, MDF 3/4 x 16-7/8 x 15 in.
R 1 Pegboard/slatted wall (optional) 18 x 34-1/2 in.
* To adjust the workbench’s overall height, add or subtract equal amounts on these four parts.
Kid’s Workbench Materials and Cutlist
1×2 x 8-ft. poplar or pine (4)
1×4 x 8-ft. poplar or pine (2)
1×6 x 8-ft. poplar or pine (1)
2×4 x 8-ft. poplar or pine (1)
1/2-in. x 2 x 4-ft. MDF or plywood (3)
3/4-in. x 2 x 4-ft. MDF (1)
3/4-in. x 2 x 4-ft. veneered plywood (1)
Pegboard or slatted wall (optional; 1)
Brad nails: 1-in., 1-1/4-in., 2-in.
1-1/4-in. and 2-1/2-in. wood screws
No. 8 x 1-in. machine screws
and locknuts (12)
Wood glue
3-in. T-strap hinges (2 pairs)
18-in. fluorescent light (1)
Plastic dish tubs or
similar containers (2)
Step-by-Step Instructions
Make the panels
Start by cutting the panels to the overall sizes in the cutting list. Use a table saw, circular saw or jigsaw to cut down the panels.
The subtop and work top are notched to fit between the legs, and the exposed corners are rounded to a 2-in. radius to eliminate sharp points.
Lay out the cuts on one of the pieces. Then clamp them together and cut both pieces at the same time using a jigsaw. Leave the pieces clamped together and sand the cut lines smooth.
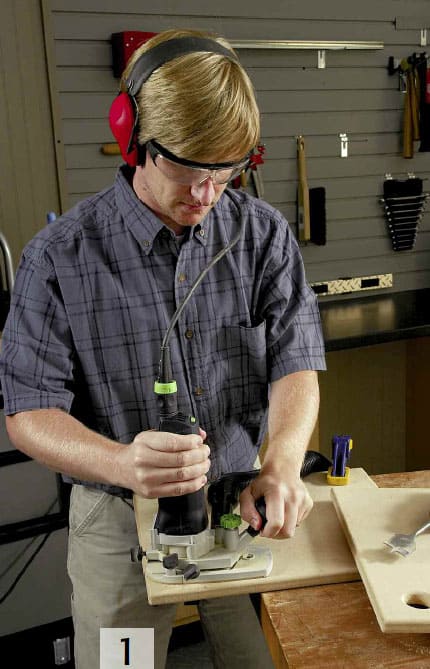
Instead of attaching hardware handles to the doors, I chose to drill handle holes. Use a 1-1/2-in.-dia. spade bit or hole saw to bore the handle holes. Use a router and 1/8-in.-dia. roundover bit to ease the edges of the handle holes, door edges and work top. Sand the faces of all of the panels as well as the door edges.
Build the frame
Most of the workbench frame is built with standard dimension lumber (1×2, 1×4, 1×6), so all you have to do is cut the parts to length. The front rails are the only two pieces that must be ripped to a narrower width.
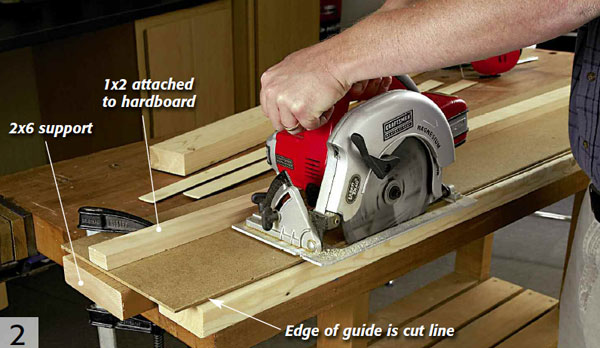
A table saw is the best tool for this task, but if you don’t have one, you can rip the pieces using a circular saw and straightedge guide.
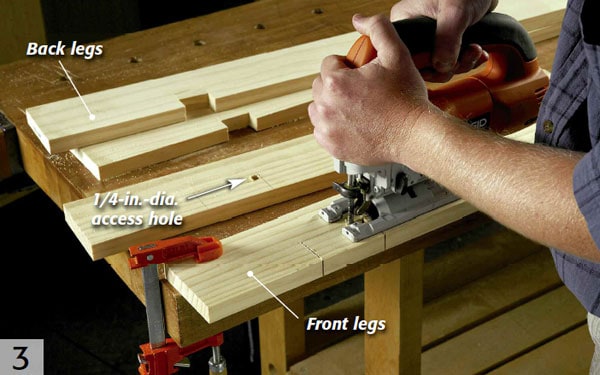
The front and back rails fit into notches that are cut in the front and back legs. Use a jigsaw to cut these notches.
Sand all sides of the frame parts smooth. Sanding the parts individually is much easier than sanding them after assembly.
Assemble the legs and rails. Attach the back rails to the back legs with glue and 1-1/4-in. brad nails.
Position the front rails in the front-leg notches. Use a square to make sure that they are perpendicular. Then attach the front rails to the front legs with glue and 2-1/2-in. wood screws.
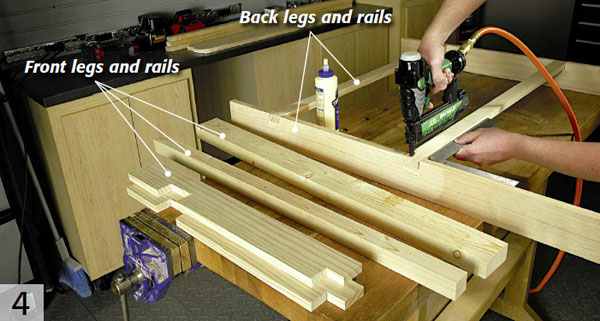
Next, attach the side rails to the front and back legs. Apply glue to the leg where the rail will be attached. Then press the rail in place and check that it is perpendicular to the leg before attaching it with 1-1/4-in. brad nails.
The brad nails don’t provide a lot of structural strength, but they will secure the joint while the glue cures. If you don’t have a brad-nail gun, clamp the parts while the glue cures.
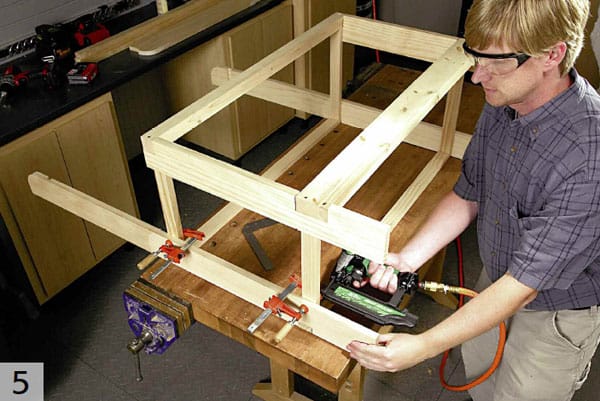
Cut the shelf and shelf back to length. Then notch the ends of the shelf and round the front corners.
Attach the shelf to the shelf back with glue and 1-1/4-in. brad nails. Then attach the shelf assembly to the back legs with screws. Drill countersink and pilot holes for each screw.
The final step in the frame assembly is to attach the front leg fronts to the front leg sides and back leg backs to the back leg sides with glue and brad nails. Then attach the middle back post to the bottom back rail and top shelf back.
Paint the parts
Fill in the nailheads and screwheads with paintable wood filler. Sand all of the surfaces smooth after the filler is dry.
Use painter’s tape to mask off a 3/4-in.-wide strip along the sides of the outside face of the side and back panels. This area will be left unpainted to provide a better glue bond for attaching these panels to the frame.
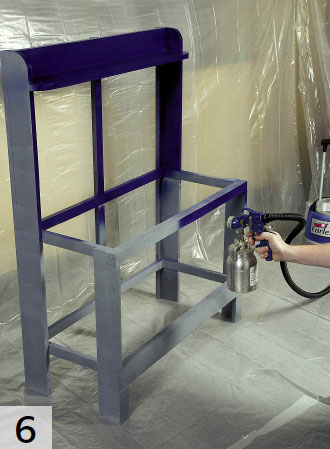
Apply a coat of primer to the frame and panels. I used a dark-tinted primer to make it easier for me to get good coverage with the deep-tone paints that I had chosen.
Lightly sand the parts again with 220-grit sandpaper after the primer is dry. Then apply two (or more) coats of paint.
You can brush or roll on the finish, but the fastest way to achieve a smooth finish is with an HVLP finish sprayer.
To achieve a smoother finish, I added a latex paint conditioner called Flotrol to the paint before applying it with the sprayer. Flotrol extends the paint’s open time (the time it takes to set), helping it flow out over the surface better, which minimizes application marks.
Follow the sprayer and paint manufacturer’s recommendations for thinning the paint.
Final assembly
After the paint has dried, remove the masking tape that was stuck to the panels and finish assembling the workbench. Attach the side and back panels to the frame with glue and 1-1/4-in. brad nails. Then attach the bottom panel.
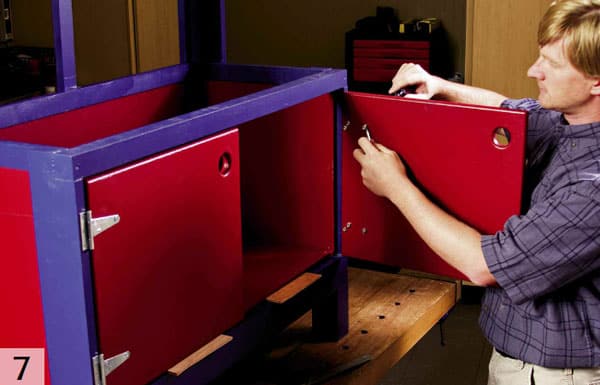
Next, mount the doors to the front legs with T-strap hinges. You can improve the strength of the hinge connection to the MDF door considerably by replacing the 3/4-in.-long wood screws that are typically included.
Instead, use No. 8 x 1-in. machine screws and locknuts to fasten the hinges to the door.
(Note: To avoid pinched fingers, don’t use snap-closing hinges on children’s furniture.)
You can choose from a couple of different materials for the hanging-tool board. Pegboard with 1/4-in.-dia. holes is probably the most readily available choice, and many types of compatible hooks are available.
But I chose to use slatted wall panels. They give the workbench a more modern look, and the hooks are less likely to fall out when a tool is lifted off the wall. Attach the tool board to the back-leg backs with 1-in. drywall screws.
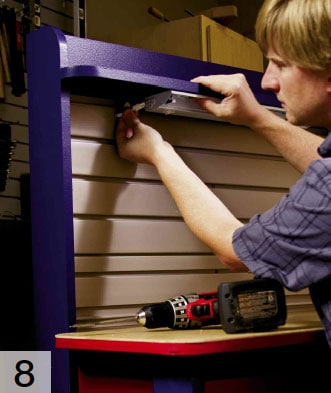
The work light is an 18-in.-long under-cabinet fluorescent fixture that plugs into the wall. (The power switch is on the fixture.) Several other types of under-cabinet lights are available, but I prefer fluorescent bulbs because they stay cool. LED lights would also be a great option.
Mount the light to the underside of the shelf and drill a 3/4-in.-dia. hole for the plug to run through the hanging-tool board.
The final step is to attach the tops. Drill pilot and countersink holes through the subtop and attach it to the top rails with 1-1/4-in. screws. Then attach the work top to the subtop with 3/4-in. brad nails.
If the work top gets worn out, you can easily replace it – and be thankful that your gift is being put to good use.


