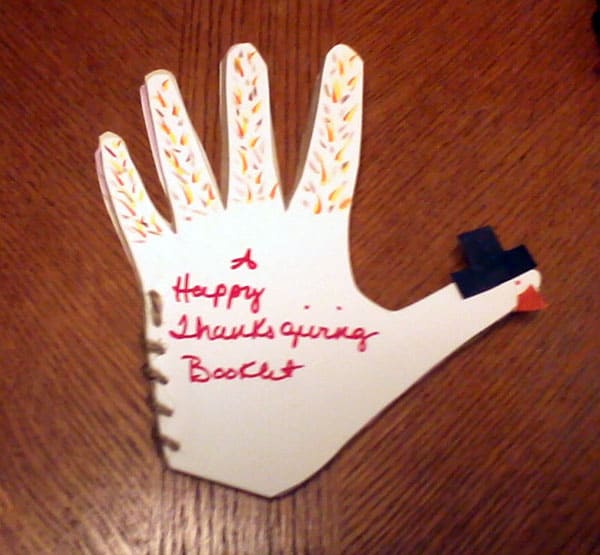
Our latest Built by You project is courtesy of Karen Phillips who wanted to share the Thanksgiving booklet that she and her children made. Read on for how she did it. Thanks Karen!!!
This idea might have well been suggested already, but I’ve thought that if I ever do have kids, a nice Thanksgiving craft would be for kids to make their own little turkey- or pie-shaped booklet for them (or their parents, lol) to write down a list of all the things they’re thankful for.
A fun part of the project (to me) would be for kids to learn how to make their “own” paper (in the very simplest way, of course), or stain regular (typing?) paper with tea or coffee, beet juice, onion skins, or whatever other more natural dyes Mom/Dad might have available in the home.
Then, after the paper is dry and with their parents’ help/supervision, they could cut the sheets of “home-made paper” into whatever shape they’ve chosen, assemble their little Thanksgiving book, and “sew” them together at the fold in the middle.
They could decorate the outsides of these books with whatever Thanksgiving motif they like, but the main idea would be for kids to experience the joy of recounting their blessings, and these “books” could be kept for years with new ones made, and filled in, every Thanksgiving.
Looking back at these memories would, I imagine, be an incredible experience for parents as they get to see how their kid’s thinking changed with the years.
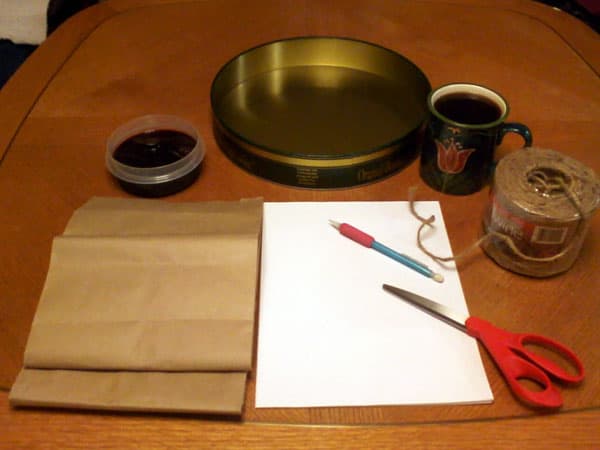
Materials for Thanksgiving Booklet:
*paper (2 sheets of regular typing paper and 1 brown paper bag are used in the example, but you can use as many sheets as you wish)
*twine (to “sew” the booklet together)
*something sharp for parents (or older kids) to use to make the “sewing holes” in the booklet
*desired dyes for paper, if any (beet juice and strong coffee are used in the example)(If using coffee, please let it cool off BEFORE using…do not ask me how I know this…)
*card stock or thicker paper for the front and back cover
*container/s to dye the paper (and perhaps a bleachable towel to dry the paper on)
*protective material (so you won’t accidentally dye something…)
*scissors
*pencil for drawing design on template
*imagination: decide what sort of shape you want for your booklet, and how you wish to decorate it.
Instructions:
*Arrange your work area in an orderly fashion. For me, this means moving the kitty out of the way a dozen times.
*If you’re going to dye your typing paper, heartily consider protecting your work area against probable spills (cat-caused or not). Go ahead and dye your paper in plenty of time for it to dry thoroughly before you begin your project.
*Once your paper is dry, consider what you want the booklet to look like. I’ve chosen the ubiquitous “hand turkey” design because it’s not only fun, but recognizable as a Thanksgiving theme.
*I found that it makes the “drawing” part of this project much easier to first draw the chosen design on a piece of card stock or cardboard and then use that template to trace the design onto the remaining sheets of paper. (Remove kitty from work area…again.)(Pet dog who becomes jealous of the “attention” being paid to said kitty…)
*Afterward, you can draw lines onto each side of the inner sheets of paper for writing the Thanksgiving list, or leave blank for kids to draw a picture, etc.
*Bind the sheets between the card stock or thicker paper cut-outs, and “sew” them together with the twine. An adult may wish to create the holes for the twine to sew through. Secure the twine at the top and bottom of the booklet, and then decorate the outside of the booklet as you wish. (Remove twine from kitty…)
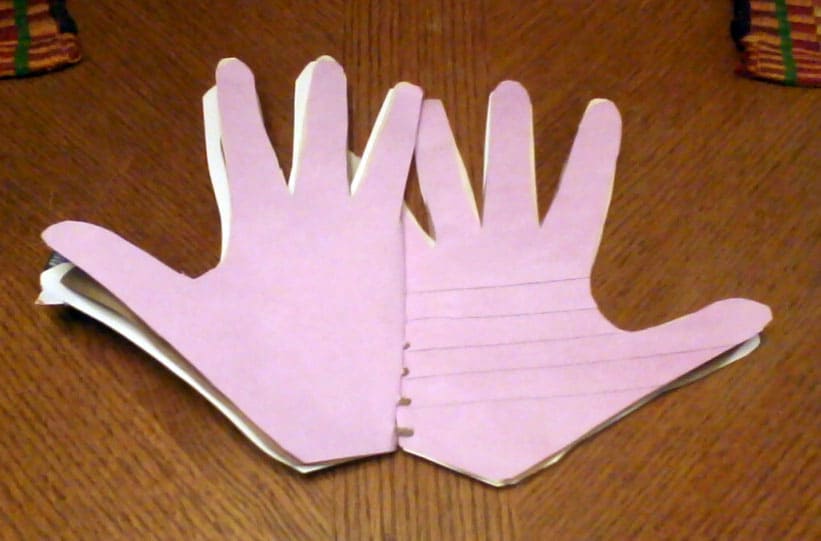
The booklets turned out a bit on the smaller size since I used my own hand to trace the “turkey”, lol, so I would recommend that a larger hand be used for the template. I’ve also attached a list of materials and a bit of an “how-to” which you are absolutely free to completely disregard.
It is painfully obvious that my “craft” is writing rather than creating Thanksgiving booklets, but still, this was fun!

