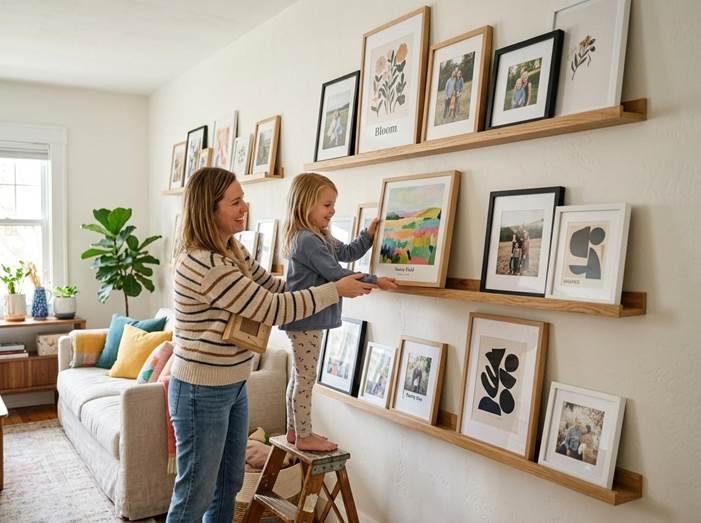
A finished family gallery rail – the kind of wall that keeps changing as your kids do
Every parent has that stack. The finger-paintings curling at the edges, the marker drawings that won’t fit in a folder, the watercolor that took forty-five minutes and three meltdowns to finish. You can’t throw them out. You can’t frame them all. And a refrigerator has limits.
A gallery rail – a simple wooden ledge mounted on the wall – solves this cleanly. Swap artwork in and out without touching a single nail hole. No re-hanging, no patching, no planning. The same two or three ledges that hold finger-paintings this year will hold watercolors, school projects, and eventually photos as your kids grow up. The wall grows with them.
This guide walks you through the full build: what materials you need, how to hang the ledges correctly, how to arrange artwork so it looks intentional rather than chaotic, and one finishing tip that makes the whole thing feel permanent. You and your kids can knock out the installation on a Saturday afternoon.
Why a Gallery Rail Beats Static Frames
Picture ledges let you rotate artwork in seconds – no tools, no new holes in the wall
The main argument for a gallery rail over individual frames is speed. New artwork goes up in thirty seconds. You lean it on the ledge, and you’re done. No measuring, no level, no hammer. That matters when you have a seven-year-old who wants to see their painting on the wall today, not next weekend.
There’s a stronger argument, too. The National Endowment for the Arts 2025 blog post “Educating Ourselves about Childhood Arts Experiences” found that out-of-school arts activities for K-5 children correlate with positive learning approaches, better interpersonal skills, lower rates of behavioral problems, and improved performance in reading, math, and science. Displaying their work signals it matters – it tells kids their creative output is worth showing off, not just tolerating.
The timing is right for this kind of wall, too. Etsy’s 2026 trend data – cited by trend expert Dayna Isom Johnson – shows gallery print searches up 80%, driven by an “Everyday Exhibits” movement that favors walls feeling “collected over time” rather than perfectly coordinated. A rotating kids’ gallery rail fits that aesthetic exactly.
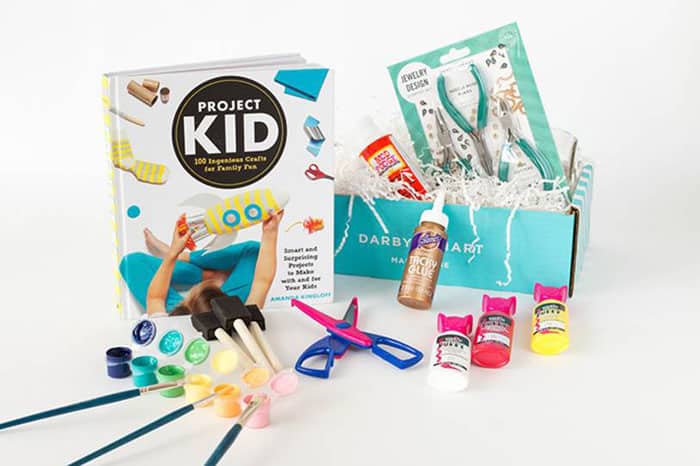
If you want more ideas for getting kids involved in the building process, hands-on creative projects for every age will give you plenty of starting points.
Mix Their Work With Something Timeless
A wall of only children’s art can feel impermanent – like it’s all waiting to be replaced. One or two pieces that will stay on the wall for years give the whole thing an anchor.
Oil paintings work particularly well for this. The texture and depth read as “real art” to kids and to anyone walking into the room, and they hold visual weight alongside colorful children’s pieces without competing with them. If you want to buy oil paintings as anchor pieces for the wall, original works tend to age far better than prints alongside a rotating kids’ collection – there’s no concern about a print feeling dated as your child’s style matures.
The arrangement logic is simple: put the purchased piece at eye height on the top ledge and fill the lower ledges with rotating child artwork. Five years from now, the lower ledges will look completely different. The top piece will still be there, making sense of everything around it.
The National Endowment for the Arts makes a compelling case for why all of this matters – treating kids’ creative work as worthy of display has measurable effects on how they approach learning and see themselves. A gallery wall isn’t just decoration; it’s a message.
That’s the “grows with the family” part in practice. The wall you build this weekend won’t be the wall you have in three years, but it’ll still be yours.
What You’ll Need: Materials and Tools

Everything was laid out before starting the gallery rail build
You have two options here, and both work well.
● Option A: Buy IKEA MOSSLANDA picture ledges. These run $9-$20 each, depending on length; they’re pre-finished, and they mount with two screws. Fastest path to a finished wall. The trade-off is that they come in white or bamboo only, so if your walls are a deeper color, you might want Option B.
● Option B: Cut your own from 1×4 pine. Add a thin front lip (a glued strip of 1×1 works) to keep frames from sliding off. More work, but you control the finish – stain it, paint it, or leave it raw. A good weekend project to do alongside the kids.
Either way, your materials list is the same: ledges, wall anchors and screws, a level, a pencil, a measuring tape, a stud finder, and a drill. If you’re building from pine, add sandpaper and your finish of choice.
The kid-friendly jobs here are genuinely useful, not just busywork. Have them hold the level, hand you screws, sand the edges smooth, or paint the ledge. They’ll be more invested in the wall if their hands touched it before a single frame went up.
For simple DIY projects to do at home that pair well with a gallery build day, check out the linked article for a few quick add-ons.
Hanging the Ledges: Step-by-Step
Plan Your Layout First
Two or three rows of ledges work for most walls. More than three starts looking like shelving. Stagger the ledge lengths (a longer one on top, shorter below) or keep them uniform – both look intentional.
Before drilling anything, use painter’s tape to mock up the ledge positions on the wall. Step back and live with it for ten minutes. It’s much easier to shift tape than to fill holes.
One number worth knowing: 57 inches from the floor to the center of the top piece is the standard “museum height” – where the average eye lands. Start your top ledge there and work down from it.
Find Your Studs and Mark Your Holes
Use a stud finder and mark stud locations with a pencil. If the studs don’t fall where you need them, drywall anchors rated for 20-30 lbs each will comfortably hold ledges with standard frames.
Hold the ledge flat against the wall at the right height, check its level, then mark the screw holes with a pencil. This is a good moment to have a kid hold one end of the ledge while you mark. They’re holding it steady, they feel helpful, and they are.
Drill, Mount, and Check
Drill pilot holes, insert anchors if you’re not hitting studs, drive the screws, and set the ledge. Before you tighten everything down, check the level again – the ledge can shift slightly as screws go in. Fully tighten once you’re satisfied.
Space ledges at least 12 inches apart vertically. Less than that, and frames on the lower ledge will visually block whatever’s on the ledge above it. Keep 2-3 inches between frames on the same ledge for a clean, gallery-like result.
Smaller frames (5×7, 8×10) are the best fit for ledges. Pieces larger than 11×14 need individual wall anchors for safety – the ledge alone won’t hold them securely.
Filling the Wall: Choosing and Arranging Artwork
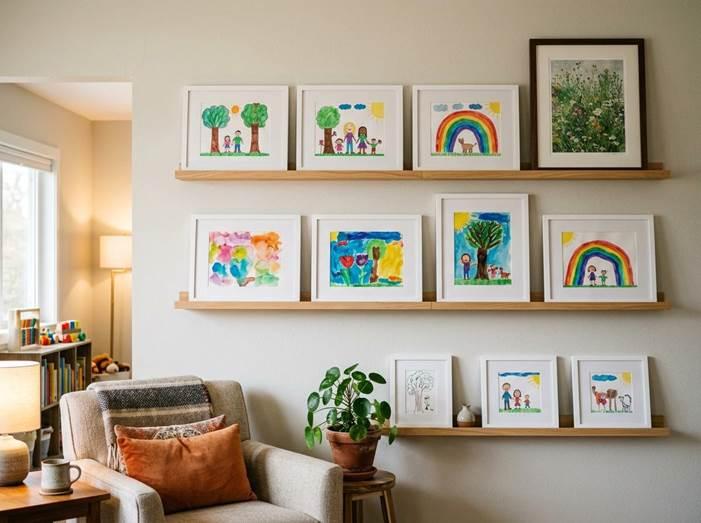
Mixing a child’s paintings with one or two framed prints gives the wall a finished, collected feel
Start with pieces your child is proudest of, not the biggest pile. Ask them which ones go up first. That conversation matters more than you’d think.
Matching frames do most of the visual work. All-white or all-natural-wood frames unify wildly different art styles – a bold marker drawing next to a careful pencil sketch will look intentional if both sit in the same frame profile. Adding a 1-inch white mat makes any piece look gallery-ready, even a drawing on lined notebook paper.
Mix portrait and landscape orientations on the same ledge. It keeps the eye moving. An all-portrait ledge reads as monotonous; a mix reads as dynamic.
Build a rotation habit from the start. Every season – or at the end of each school term – pull out two or three pieces and swap in new ones. Archive what you remove in a flat folder or keepsake box. According to Americans for the Arts, kids who engage regularly in arts activities are four times more likely to be recognized for academic achievement. A wall that treats their work as exhibition-worthy reinforces exactly that message at home.
You can also work on non-traditional pieces. Turning recycled materials into wall art is one approach that adds texture and personality to the mix – particularly good if you want something durable on the lower ledge that younger kids won’t accidentally knock over.
The Best Gallery Walls Are Never Finished
You don’t need to get the arrangement perfect before you call it done. Put up what you have. Live with it for a week. Move things. Swap a frame. Add a small plant or a ceramic object on the lowest ledge for some dimension.
Kids change their minds about what they want displayed. That’s the point. A gallery rail makes it easy to say yes to those changes rather than treating the wall as something precious to protect.
Whether you use picture ledges or picture hangers without nails, creating a dedicated space for kids’ artwork makes it easy to celebrate their creativity and swap in new pieces over time.
The build itself – an afternoon with a drill, a level, and a kid handing you screws – is worth doing for its own sake. The wall that comes out of it just keeps giving.