Box hockey is a classic game that we feel deserves a much needed resurgence. It’s easy to learn, fun at any age and can be a great workout.

The one drawback is that I can be addicting for your kids but better to have them hooked on an outdoor game then playing video games inside.
The rules are simple. Place the “puck” on top of the center board each player touches the bottom of the box and then each other’s stick three times, counting 1-2-3 then go! After the third tap your objective is to slap/poke the puck through the holes cut in the wood to score a goal. You can play best of three of first to 11. If the puck flies off the board then do a restart. The only other rule is to keep your stick down!
Like corn hole, this game can be built using easily found materials from your scrap lumber pile and in less than an hour you’ve got a sturdy box hockey rink that will provide endless hours of competitive fun.
Tools and Materials
The only tools you need are your cordless drill/driver and jigsaw. The materials are almost as simple as one piece of 5/8” plywood cut to 6’ x 2 ½’, two pieces of 72” long 2x4s, and three pieces of 27” 2x4s. You’ll also need a couple wood broomsticks to serve as box hockey sticks and a scrap piece of wood will works well as a puck.
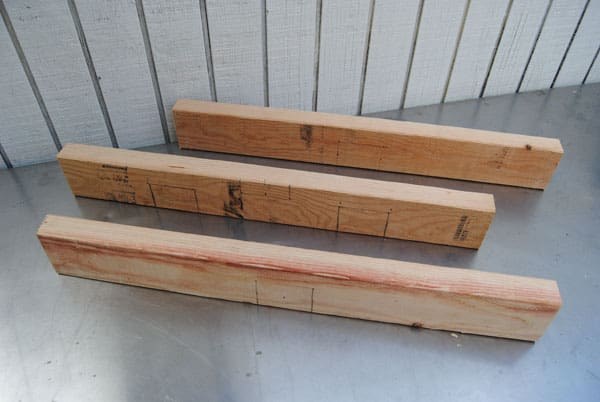
Step 1 – Cut Lumber
Assemble all of your pieces and cut the plywood and 2x4s to the required length.
Begin by cutting notches in the plywood. You’ll want one notch for each end piece for goals and three notches for the center piece
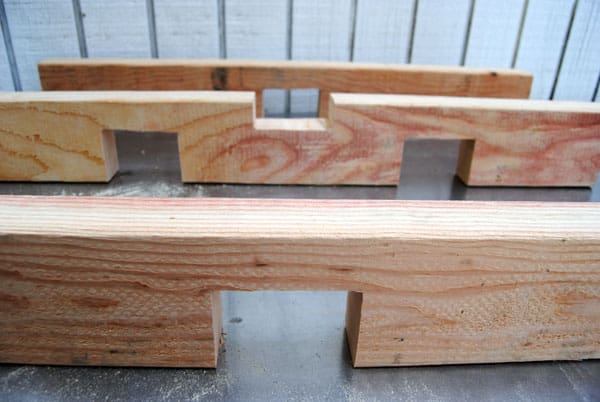
The notches for each goal and the pass through holes should be 3” wide and 2 ½” tall. The center notch that goes on the top of the middle board and is used to place the puck for face-offs should be 3” wide and 1” deep.
The holes for the goals should be centered on each board and the two holes for the pass-through should be 6 inches from each end of the center board. The top face-off notch should be centered on the opposite side of the board.
Step 2 – Build the Frame
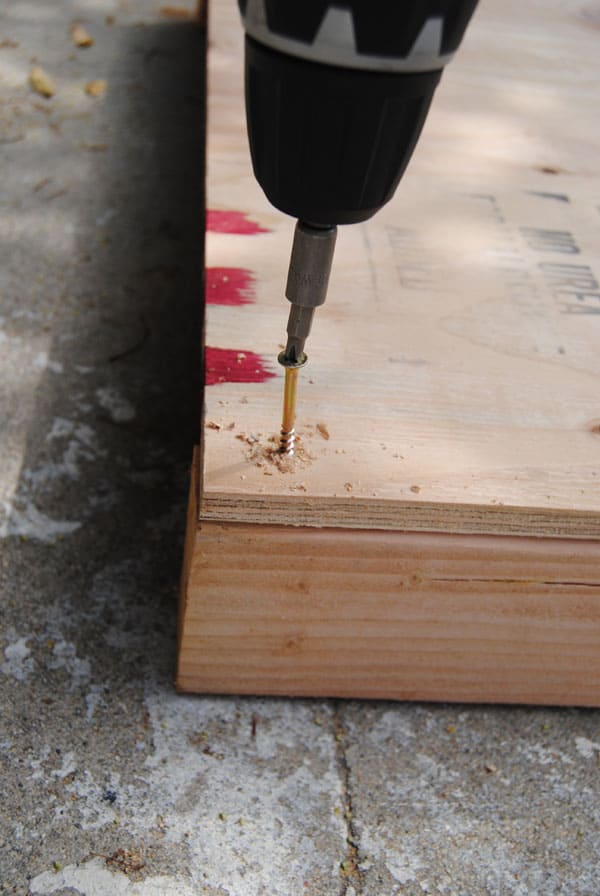
After your notches are cut you can start building the frame. Attach the ends and the sides using 2” deck screws. Pre-drill the holes for a straighter and faster setting nail.

Step 3 – Attach Plywood
Once your frame is built, lay it down on the ground with the end notches facing up. Then place your plywood evenly across the top and make sure all of the corners are square.
Pre-drill holes through the plywood and straight into the 2x4s then drive your screws. Attach each corner and drive a screw every 12 inches for maximum strength.
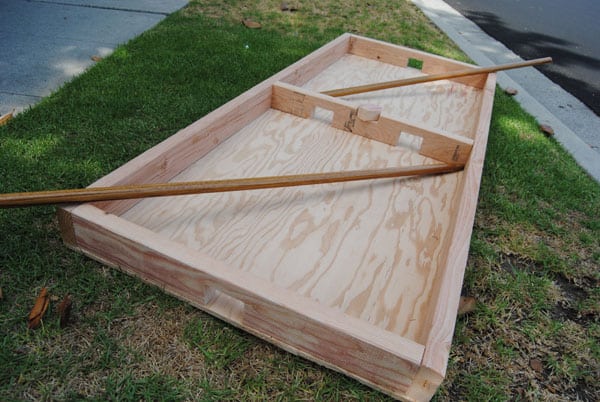
Place your center 2×4 with the two open notches down in the middle of the box and drive two screws on each end and up through the bottom.
Step 4 – Drop the Puck
Use a piece of scrap wood cut to 2”x1” as a puck and grab two broomstick handles and you are ready to play.
If you’d like to personalize your board with the colors of your favorite hockey team, you can paint it any way you’d like but take note that a box hockey board suffers a lot of abuse so any paint job will eventually get scratched up which we think gives your board more character.
Enjoy this classic game that will entertain everyone for years.